Order Details and Merging Orders
1. Order Details & Management
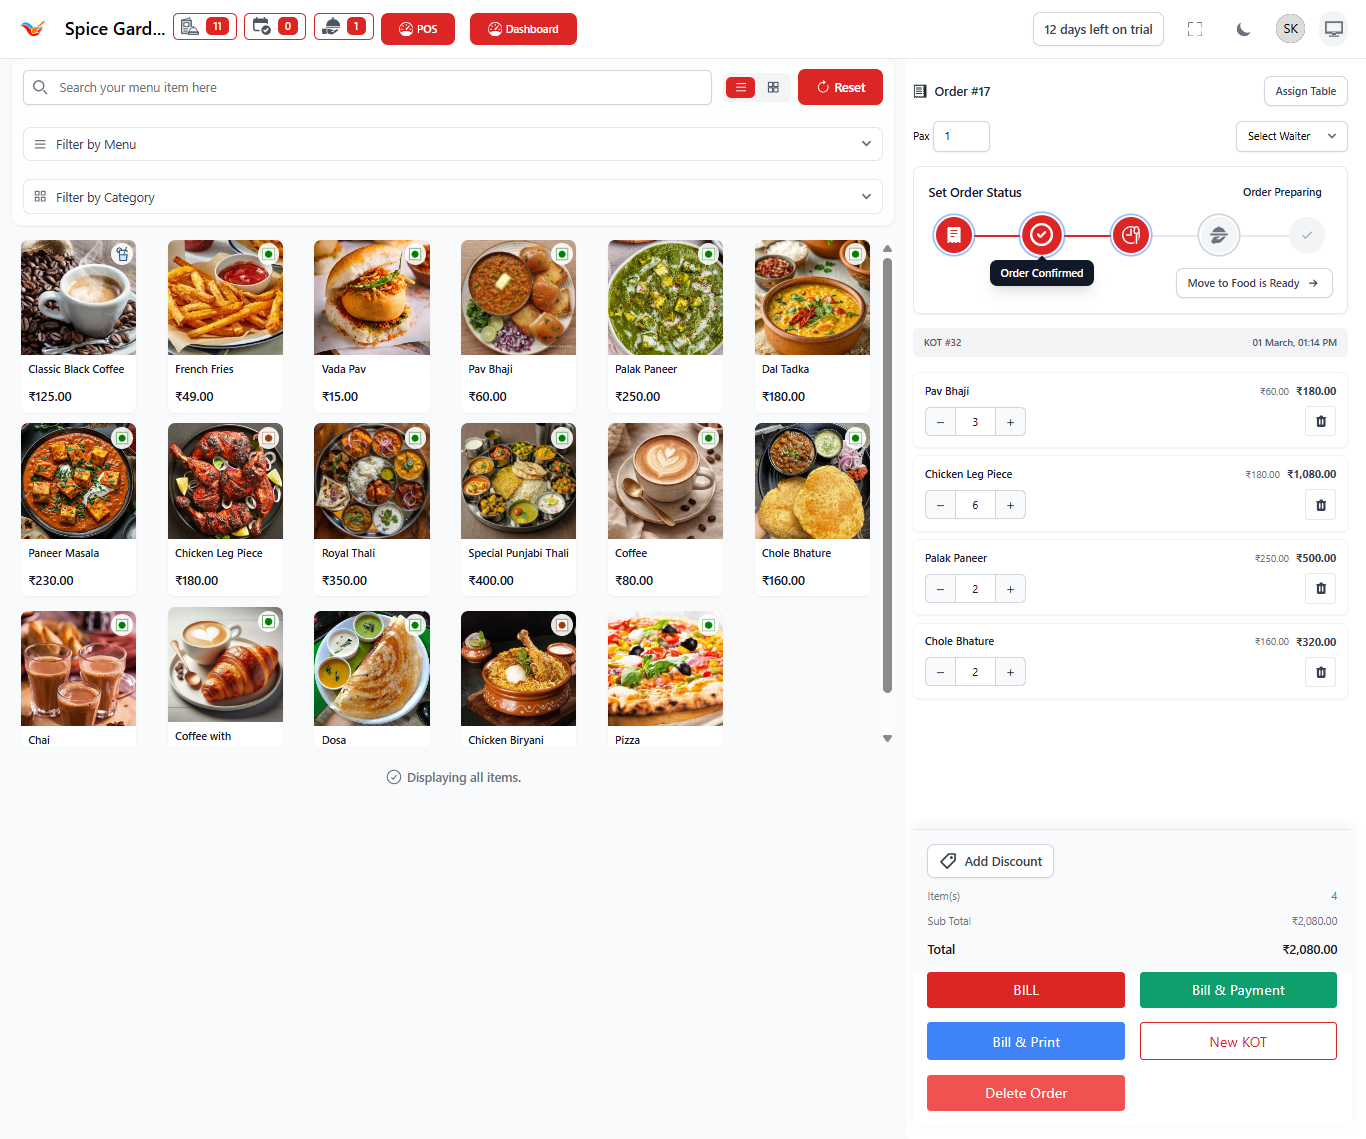
Clicking any order opens the detailed order management screen where staff and owners can control the entire lifecycle of the order.
Order Information Panel
- Order ID — Displays active order reference.
- PAX — Number of guests assigned to the table.
- Assign Table — Attach or change dining table.
- Select Waiter — Assign responsible staff member.
Order Status Workflow
The visual progress tracker shows the current stage of the order:
- Order Confirmed
- Preparing
- Food Ready
- Completed
Managers can update the order stage as food preparation progresses.
Items Management Section
- Add items directly from menu grid.
- Increase or decrease item quantity.
- Remove items if required.
- Apply modifiers automatically.
Billing Summary
- Item Count — Total ordered items.
- Subtotal — Cost before adjustments.
- Discount Option — Apply manual discounts.
- Total Amount — Final payable bill.
Order Action Buttons
- Bill — Generate invoice.
- Bill & Payment — Direct payment processing.
- Bill & Print — Print invoice instantly.
- New KOT — Send additional items to kitchen.
- Delete Order — Remove order if cancelled.
Why Orders Management is Important
The Orders module acts as the operational backbone of the restaurant system. It enables owners to:
- Track real-time business activity
- Monitor kitchen efficiency
- Prevent billing mistakes
- Analyze staff performance
- Ensure faster customer service
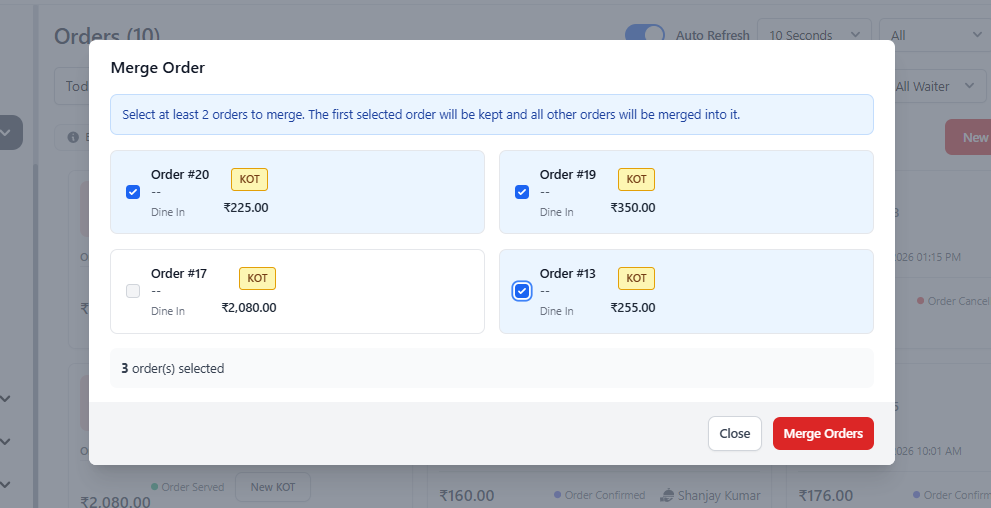
Merge Orders
The Merge Orders feature allows restaurant staff and owners to combine multiple active orders into a single order. This is commonly used when customers shift tables, join groups, or request a combined bill.
1. What is Order Merging?
Order merging combines two or more existing orders into one master order. All selected orders are merged into the first selected order, and their items, totals, and billing details are consolidated automatically.
2. How to Merge Orders
- Navigate to the Orders section.
- Click the Merge Order button.
- The Merge Order popup window will appear.
- Select at least two orders using the checkboxes.
- Review selected orders and their amounts.
- Click Merge Orders.
The system will automatically combine items and update the final order total.
3. Understanding the Merge Orders Window
Order Selection Cards
- Order Number — Unique identifier for each order.
- Order Type — Indicates Dine-In or POS order.
- KOT Label — Shows kitchen order exists.
- Order Amount — Current total value of the order.
- Checkbox — Select orders to merge.
Selected Orders Counter
Displays how many orders are currently selected for merging. This ensures staff confirm the correct orders before merging.
Action Buttons
- Close — Cancel merging process.
- Merge Orders — Combine selected orders.
4. What Happens After Merging?
- All items move into one order.
- Total bill amount is recalculated.
- Kitchen tickets remain linked.
- Only one final bill is generated.
- Duplicate orders are removed from active list.
5. Common Use Cases
- Customers shift to another table.
- Multiple groups decide to pay together.
- Separate orders need one invoice.
- Waiter mistakenly created multiple orders.
6. Important Operational Rules
- At least two orders must be selected.
- The first selected order becomes the main order.
- Merging cannot be undone after confirmation.
- Ensure correct orders are selected before merging.