Create a Manual Reservation
Create a Manual Reservation
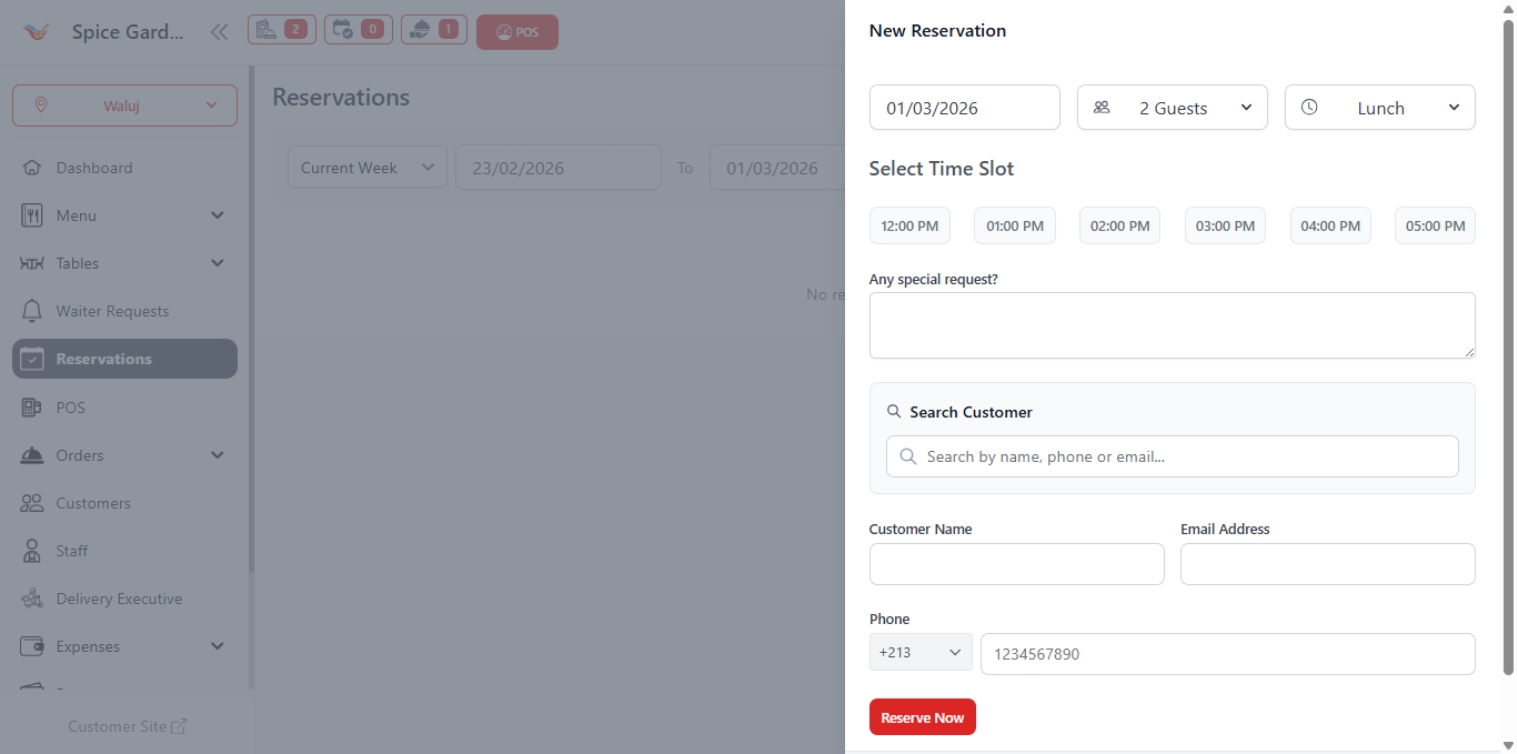
Staff members can manually create reservations for customers who book via phone, walk-ins, or special requests directly from the reservation dashboard.
Step 1: Open the Reservation Panel
- Navigate to Reservations from the sidebar.
- Click the New Reservation button.
- The reservation creation panel will open on the right side.
Step 2: Select Reservation Details
Configure the reservation schedule before adding customer details.
- Date — Select booking date.
- Guests — Choose number of people.
- Dining Slot — Select Lunch or Dinner.
- Time Slot — Choose available reservation time.
Available time slots are controlled by restaurant operating hours and reservation settings.
Step 3: Add Customer Information
You may select an existing customer or create a new one.
- Search customer using name, phone, or email.
- Or manually enter:
- Customer Name
- Email Address
- Phone Number
Use the Special Request field for additional instructions such as birthday setup, preferred seating, or accessibility needs.
Step 4: Confirm Reservation
- Review all reservation details carefully.
- Click Reserve Now.
- The reservation will appear instantly on the reservation dashboard.
Reservations may be automatically marked as Confirmed or
Pending depending on system configuration.
After Creating a Reservation
- Assign a dining table if required.
- Update status when guests arrive (Checked In).
- Mark as No Show if guests do not arrive.
- Cancel reservations when requested by customers.
Keeping reservation statuses updated ensures accurate table availability for future bookings.
Why Manual Reservations Are Important
- Accept offline or phone bookings
- Manage VIP guests efficiently
- Reduce customer waiting time
- Improve restaurant planning
- Maintain organized seating schedules